
Handle my absences
If your absences are not automatically synced through HR management systems or automated APIs, manually adding your out-of-office status in FlexyNook ensures accurate workspace management. Indicating when you are away frees up assigned workplaces for colleagues to book and provides clear visibility on who is working on-site.
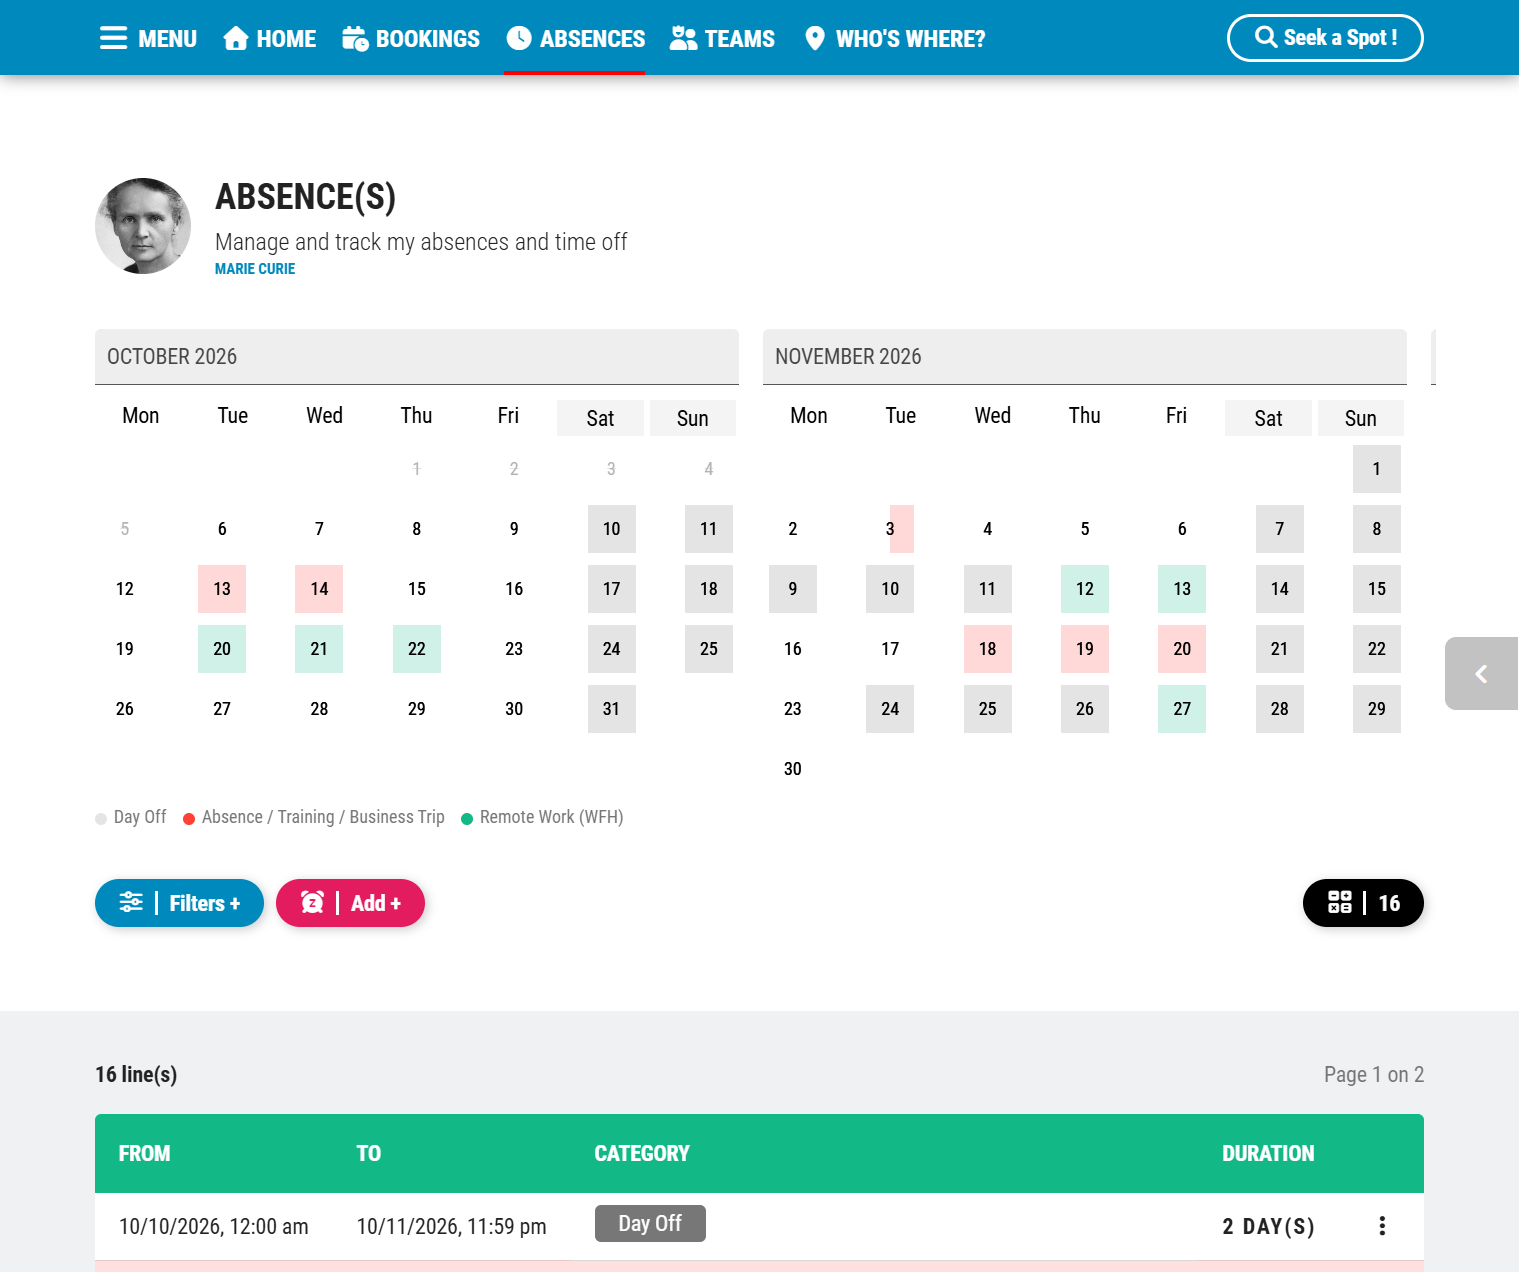
FlexyNook supports three absence categories:
— Work From Home
— Day Off
— Absence, Training & Business Trip
How to Add an Absence
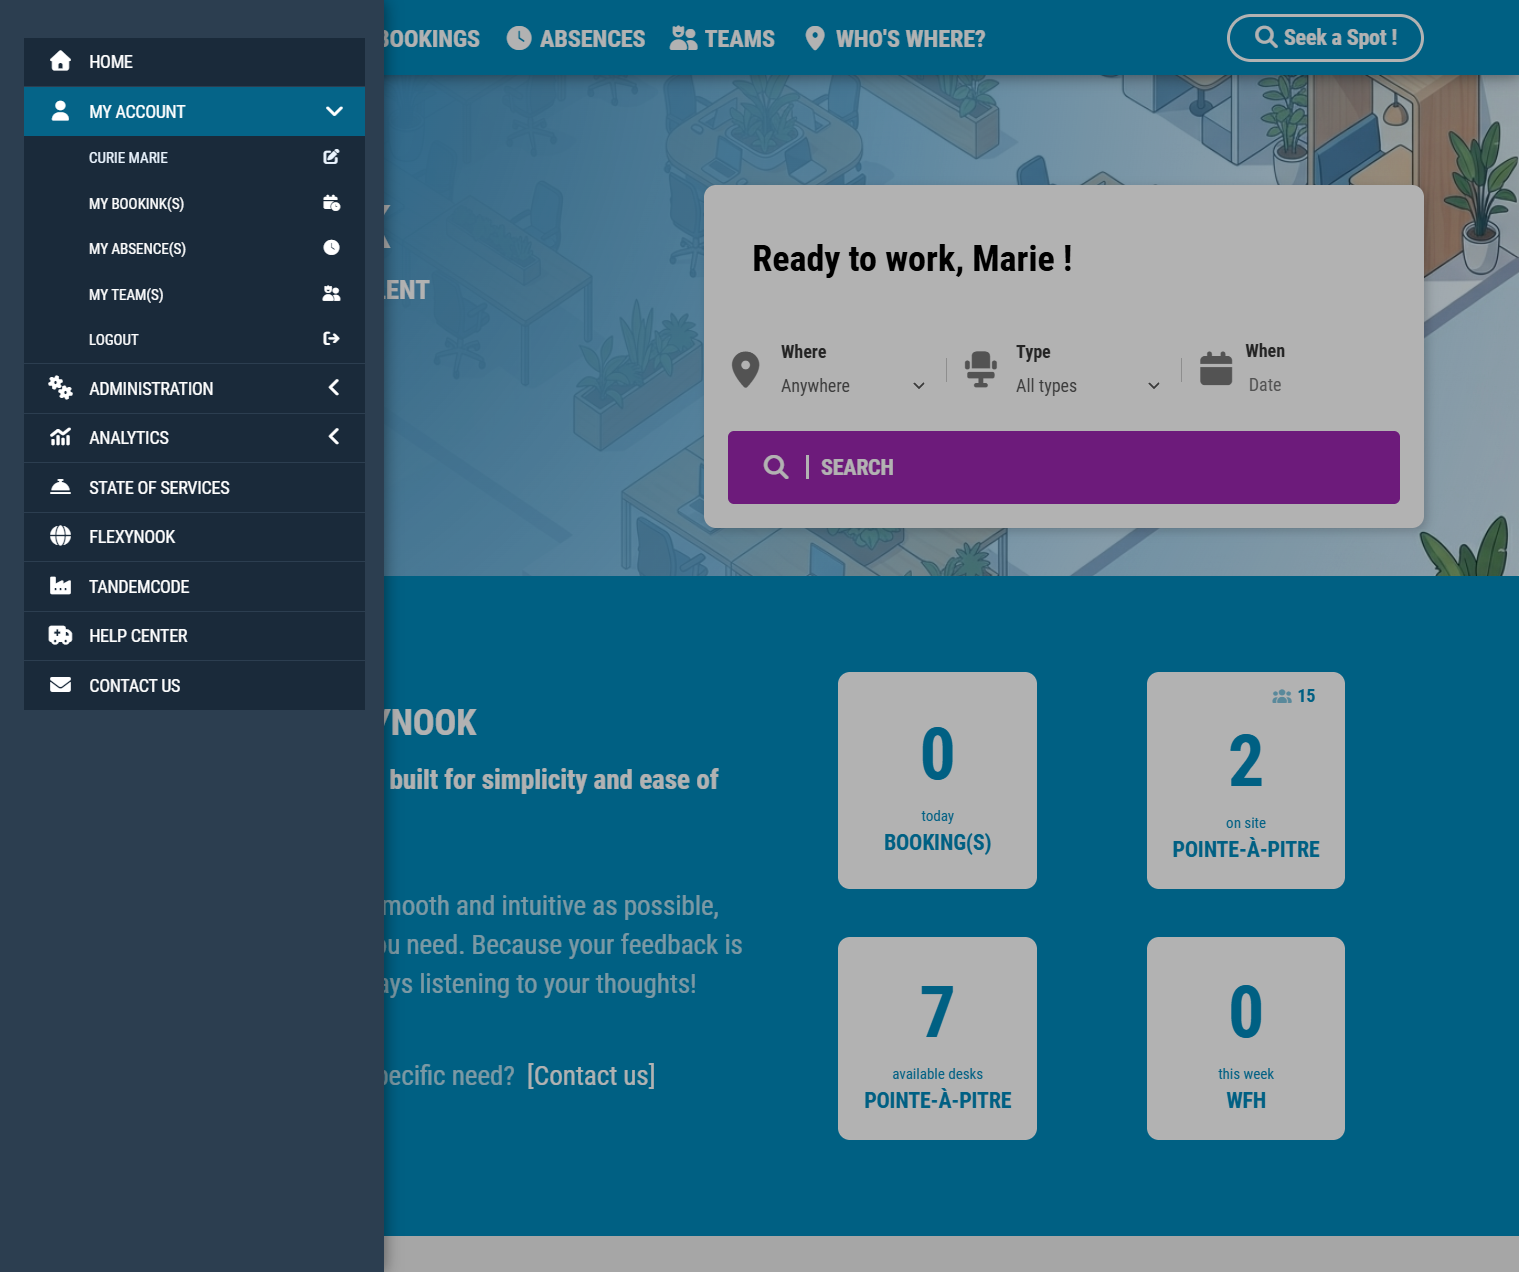
1 – Navigate to My Account in the main menu and select My Absences.
2 – Click the “+ Add” button.
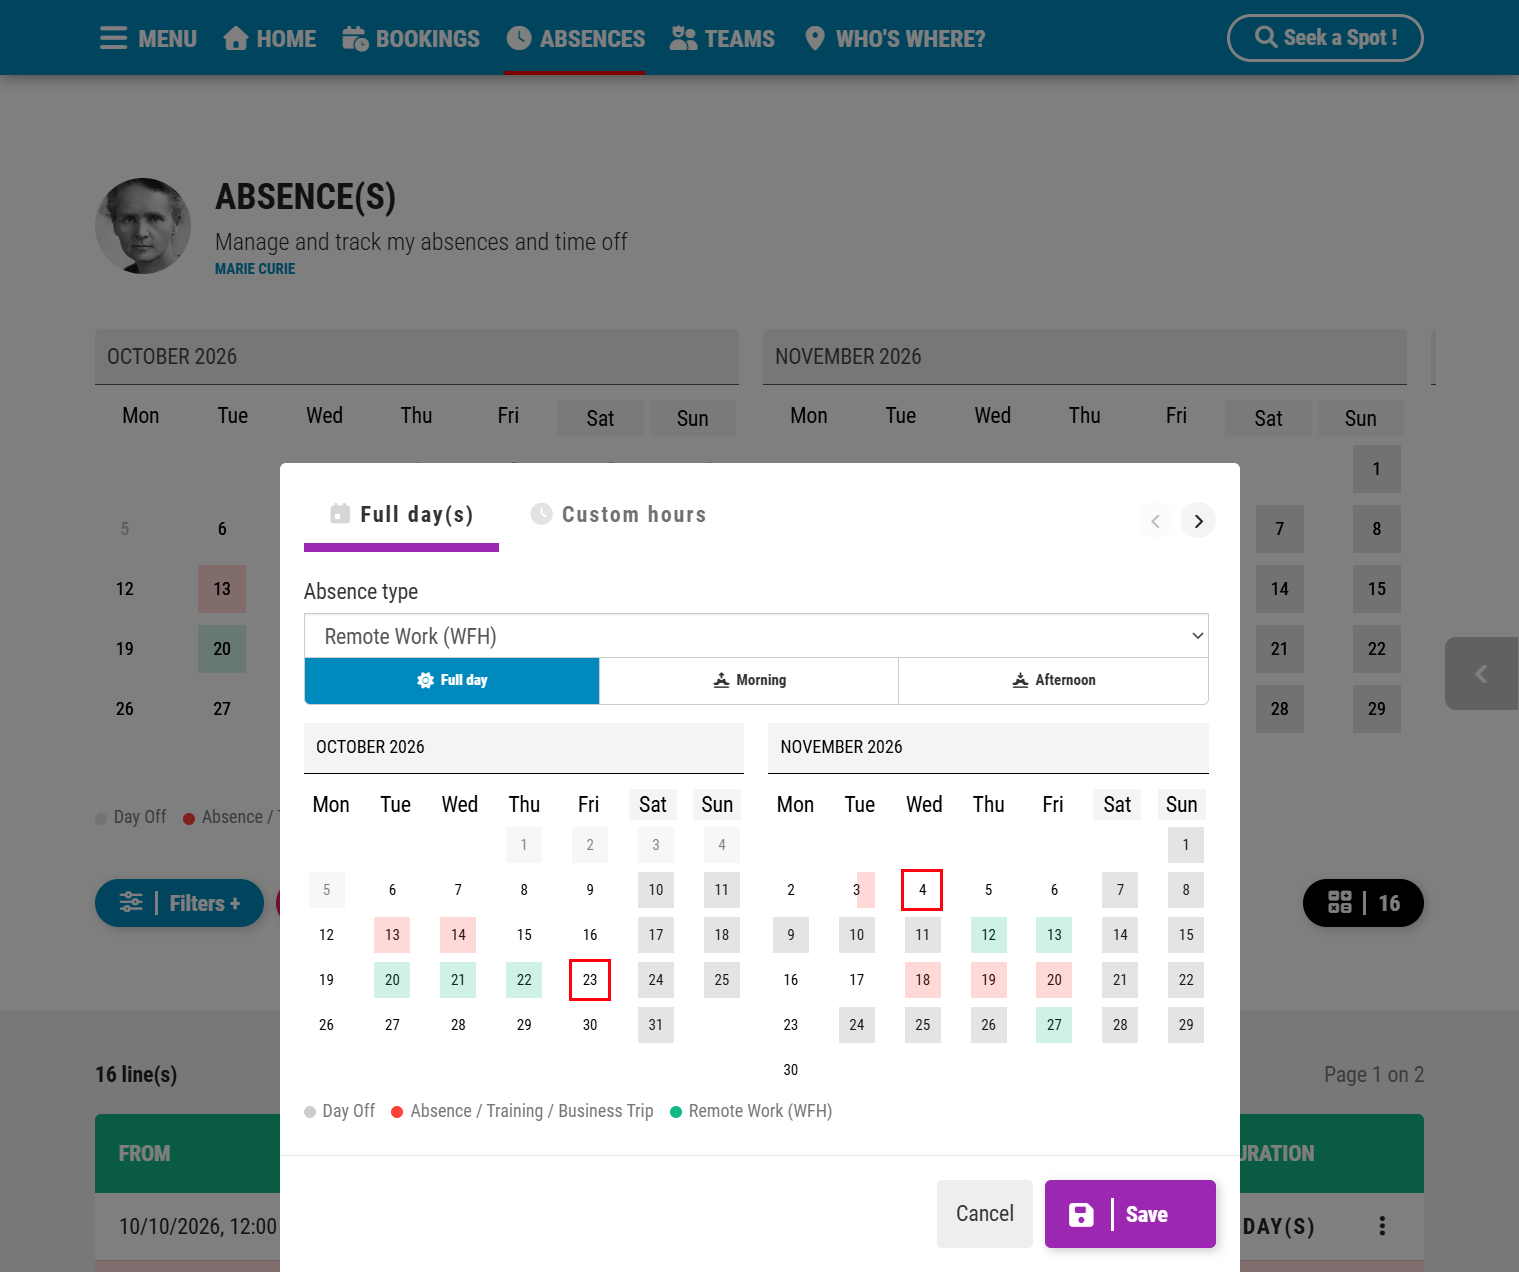
3 – In the pop-up window, select your absence type (Work From Home, Day Off, or Absence/Training/Business Trip).
4- Choose your time frame:
— Full Days or Half Days (Morning / Afternoon): Select multiple dates at once to apply the same absence type across several days.
— Partial Day (Fraction of a day): Enter specific time fractions day by day for custom schedules.
Save your entry to update your presence status and adjust workspace availability.
Important Note: Deleting an absence and booking conflict
If you have a permanently assigned workspace, deleting an absence may cause a booking conflict if another user booked your spot while you were away.
In such cases, priority is always given to the assigned workspace owner. The user who booked your workspace will automatically receive a conflict notification inviting them to choose another available workspace.
For the assigned desk owner, this process is completely seamless and invisible, your workspace is automatically restored to you without any extra action required.
Have a question about this guide or FlexyNook?
Need help configuring your spaces or want to clarify a feature? Our team is here to help you get started.